16, 25, 35 and 50mm Aluminium Venetian Blinds
All alumimium venetian blinds come complete with installation brackets. They are wrapped extremely well and care should be taken when unwrapping as larger blinds in particular can be damaged if care is not taken at this time. It is advisable to have help when installing large blinds as headrails can be easily bent if not supported along the length of the blind. Once unwrapped the blind should always be handled from the underneath of the headrail providing maximum support for the blind.
Inside mount
- Brackets provided should be placed evenly along the length of the blind taking care to place all brackets away from the internal controls of the blind. End brackets should be placed as close to the ends of the blind without interfering with the internal workings of the blind. Placing brackkets over any of the internal workings of the blind could cause damage to the blind and will stop the blind from working correctly.
- Ensure that the brackets are lined up evenly in the recess of the window. Mark the screw holes with a pencil on each bracket. Drill a pilot hole and then screw bracket in place.
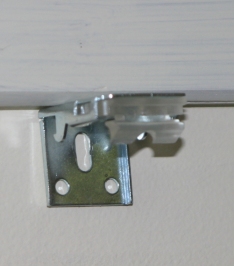
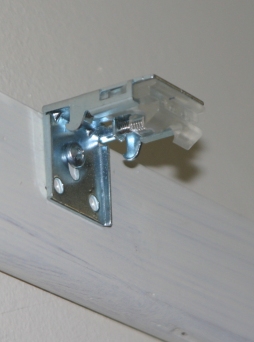
- Holding the blind from underneath the headrail, place the front lip of the headrail into the brackets along the length of the blind as shown and then push towards the window and up to clip the back lip of the headrail into place over the rear hook on the bracket. On very large blinds you may need to work from one side of the blind to the other and this is where it is beneficial to have someone help you to hold the other end of the blind while you are installing the opposite end.
- The blind can now be lowered . The diagram illustrates the lowering of the 'ultrawand' control system. Hold the cords of the blind in your left hand and with your right hand gently pull down on the wand. (Let the cords slide through your hand as the blind is lowered). The wand is spring loaded and can be stopped at any point. When in the fully lowered position the cords will be fully enclosed within the wand. A breakway tassel is attached to the ends of the cords and will breakapart if animals or children get caught in the cords. When raising the blind pull down on the ends of the cords and loop excess cord over the hook on the side of the wand. This keeps cords tidy and off the floor.
|
 |
 |
|
Outside Mount
- Brackets provide should be placed evenly along the length of the blind taking care to place all brackets away from the internal workings of the blind. End brackets should be placed as close to the ends of the blind without interfering with the internal controls.
- Ensure that brackets are level on the face of the window. Mark the screw holes with a pencil on each bracket Drill a pilot hole and then screw in brackets.
- Holding the blind from underneath the headrail, place the front lip of the headrail into the brackets along the length of the blind as shown, and then push towards the window and up to clip the back lip of the headrail into place over the back hook on the bracket. On very large blinds you may need to work from one side to the other and it may be beneficial to have someone help hold the blind while you are installing from the opposite end.
- The blind can now be lowered.
|
| All blinds are supplied with child safety devices |
Removal of the blind
Lift the blind and again hold the blind from beneath the headrail push back on the blind to release the blind from the back lip of the bracket and pull down gently.
* Please note: All of our blinds now come with installation guides packaged with the blinds. Please note that we rarely supply screws and wall anchors as we do NOT know what you are fixing your blinds into *